Monday 27 March 2017

WEEKLY ART PROJECT #25; DOGBANE

This week I have not only been cutting back layers of fabric, but I have been mercilessly cutting back...actually, more realistically, HACKING back....a few plants that have threatened to overtake our garden.  One of those plants is dogbane, which may well be a repellent against dogs & cats, but it is so stinky, invasive & rash inducing, that it is a bane to we gardeners as well!


Nevertheless... it has a very pretty flower & I particularly like it in bud form.  Therefore, to compensate for the fact that I have severely reduced it's life expectancy in my garden, I chose to focus on it for this week's art project!

The leaves are an interesting shape with serrations along the upper edge.  They also form an attractive cluster, so I began by drawing them.

Then I drew the bud, choosing to stick to a linear representation, as time was not an abundant commodity this Monday!!

A rummage through the green fabric drawer for leafy greens, then...


...another in the purples, from which to source my final shortlist of fabrics.

Within the design, I wanted to reference both the leaf shape as well as the bud.  Using the leaf shape as a kind of frame in which the bud would sit,  I then cut back the first layer leaving a space to sew on....

...the 'sandwich' of layers I would be using to create the bud.

Before cutting back the bud though, I had one more section to sew on.  I took the leaf I'd cut out from the section below & carefully placed it on top of my bud.  This would give me my green ends to each of the bud 'petals'.

As you may have noticed, there is a LOT of fabric wastage in this technique!  Consequently, I have overflowing scrap bins in different colours.  These are helpful when making cards, doing fabric collage or even trying to rustle up an approximate colour plan for my larger pieces.  When I can reuse a discarded piece of fabric, I do.  Using it within the same  art piece, as I have here, is a bonus!

And so the cutting back began!  From this...
...to this, and then...
...finally this!  I was very pleased with the design, the colours & the way it was all coming together, but it needed just a bit of tweeking.


Adding stitch to the very edge sections of this design, reinforced the 'frame' effect & helped to focus the viewer's eye on the flower bud.  A very pleasing end result achieved in a relatively short space of time.

The weather has finally turned a little more autumnal (mid 20's celsius), which means I will be spending more time trying to tame the garden before winter comes.  Whilst I'm cutting back & digging up, who knows what plant will grab my attention & beg to be my muse next week!

Until then...happy cutting!


Monday 20 March 2017

WEEKLY ART PROJECT #24; THE HUMBLE STONE

These days, I don't follow many blogs, unless they appear in my Facebook feed!  There are a few non-Facebook ones, however, that I do make the effort to dip into occasionally. I use the word 'dip' on purpose, because these particular blog sites are like a balm of cool water that I can immerse myself in & come out feeling refreshed, calm & energized.

One of those sites is Tanglewood Threads (tanglewoodthreads.blogspot.com) where textile artist Penny Berens shares her work & process.  Over the past few years she has completed some INCREDIBLY beautiful pieces to a consistent repetitive  theme. Last year she produced daily/weekly cruciform patches from her fabric scraps.  This year she is stitching stones...stones that mean something to her, that have caught her eye, have been a catalyst to thought & contemplation.

Using fabric & hand-stitch she is producing an exquisite body of work, that is truly a visual meditation. It is also a very clever way of recording those little treasures, like feathers, stones, & leaves, that we arty types tend to collect on our walks & adventures in the big wide world.

My collection of 'stones-that-grabbed-me' cluster around pot plants.

This one was my muse for this week's art project!

Using watercolour pencils & a water brush, I started the process of discovery with some colour sketches of both sides of this stone.

Whilst I would also choose stitch as the means of portraying this stone, if I were engaged in a project like Penny's, for this weekly art project however, I am determined to stick to contemporary reverse applique.  Therefore, I needed to break the image down into lines.

From there, I worked up a design & chose some fabrics that closely matched my small painting.  Not having a clue as to what background I was going to use, I decided to create the stone as a single entity & attach it to a background later.  After stitching a complete outline, I used my design to guide me as I cut back each layer.

This was how my little stone looked when all the cutting back was completed.  Now I needed to choose a background & believe me....this was a difficult task!  Here are some of the options...


That was the shortlist!

I finally made a decision based on the fact that it was interesting fabric without over powering the stone in the foreground, and each colour coordinated with those in the stone.  Having said that...it still needed something more.  Out came the stencils & I chose this one as it was the closest resembling bricks. Bricks, because my stone sits on bricks!  Using a fabric pen I traced the pattern randomly leaving out some of the crosses.

I then put the whole lot under the sewing machine needle again & attached the two.  It still wasn't quite right though!

So out came the paints & I started painting in some of the crosses...

...until it looked like this.  This is looking much better, but is still lacking....SOMETHING!

Perhaps a horizontal line????

By this stage, this small 15cm squared piece of weekly art project had taken a few more hours...yes, HOURS...than my guiltometer was happy with!  Therefore I left it at this point.

As with some of the other unexpected contributions to this weekly discipline focused on my garden, I am SO glad to have the stone there in the mix.  It reminds me that there is a lot more to a garden than plants.  It reminds me that, whilst I don't very often really focus on the stones when I walk past them, if they were removed...I would miss them.  It reminds me that even the smallest things we so often take for granted, are worthy of our undivided attention once in a while...even if it takes hours!


Monday 13 March 2017

WEEKLY ART PROJECT #23; LONGING FOR MOROCCO

It all started when my husband sat down at the kitchen table, pulled down the Moroccan cookbook from the shelf, flicked through & said, "Ooooo, can we please put Chicken & Olive tagine on the menu plan for this week?" (Oh yes we could!)

The very next day a friend sent me a message saying she was off to Morocco & asked what pens I recommended for sketching & journalling whilst away!

That night, whilst making a salad,  I opened up a beautiful red pomegranate to find the most pitiful, dry kernels & consequently grumbled away that "I wish I was in Morocco where they have decent pomegranates...mutter....mutter....mutter."

On Saturday morning, I sat on the front porch, coffee in hand, & asked my husband, "What flower should I work from for my weekly art project this week?"  He replied, "How about that small purple one at the front gate, it's in flower at the moment". "Oh, you mean that Moroccan Ground cover one?" "Yep, that's the one!"

Sometimes life just seems to flow to a theme!

This beautiful little ground cover really does have 'Moroccan' in it's name.  Unfortunately, I'm not greenfingered enough to remember plant names properly, so it is usually 'That-Little-Moroccan-Thingy'. Regardless of it's proper name, it is charming.

But, what was I going to DO with it this week?????

Because Morocco has been so much on my mind, I have spent some time going back over the photos of our trip there a few years ago. (Never once did I see this plant there by the way!!!)

I am particularly enamoured with & inspired by the fabulous decorative work of Moorish buildings.
They truly make my heart sing, & a lot of my main art work references this style.

Looking at them again, I wondered whether I could recreate this little flower into a design reminiscent of the fabulous tile work I saw over there.

No harm in trying, right???

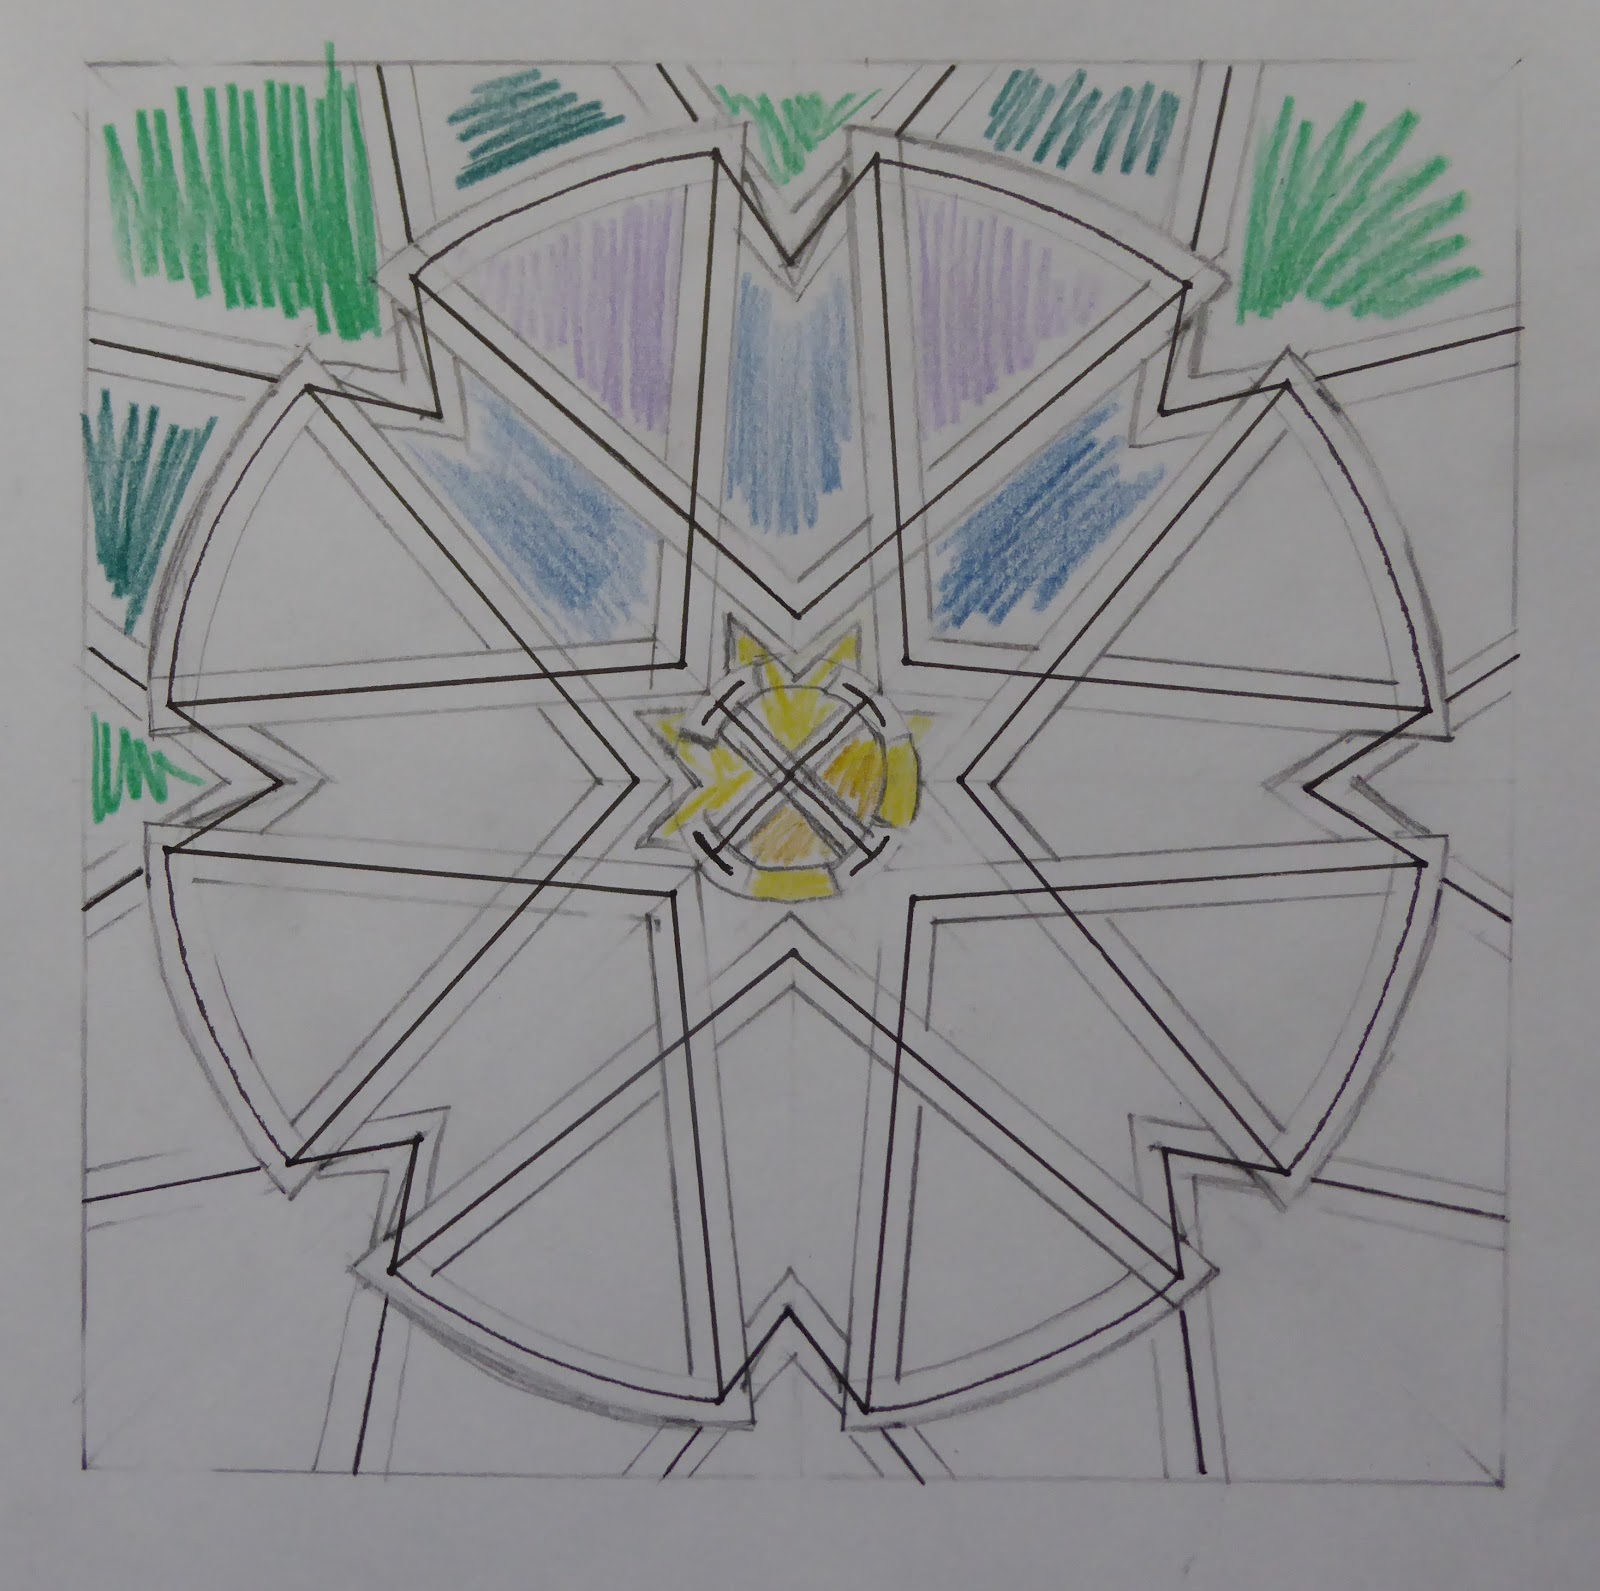
Out came the pens & paper & over an embarrassing amount of time, I managed to work out a few ideas that just might work!

Out came the rulers & templates & I set about transforming my rough squiggles into a well planned geometrical design.

Usually I work out my colour scheme and THEN rummage through my stash.  This time, however, I particularly wanted satin fabrics to give the shine of tiles, so I had to see what my resources were before choosing my colour palette.

I played around on paper with a few combinations & also decided what my stitching lines would be.  I made the brave decision to have 2 different outlines.  The lower (slightly darker colour) would be sewn on first, and then the top one would be sewn on.  This is tricky because they have to match up.  I try & help myself with this by having both pieces exactly the same size & place them accurately first on the light box to trace the design, & then on the fabric sandwich to stitch.  Even so.....things don't always go to plan!

Take a look at how the cutting back went...


   It may be hard to believe, but I cut back 8 layers in this piece!  There was just one final thing to do.

The difference between these last 2 images, is that this one has been ironed!  It seems to set the piece & give it a more finished look.  I know that with all the man-handling of cutting back, the outlines have become a bit frayed, but I can trim them later.

I am very pleased with the end result, as I don't feel my little flower has been lost in the process of geometrification! This does also resemble Moorish tile work...albeit in a somewhat simple form.

This week's project highlights that inspiration can come from all manner of things & experiences!!


Monday 6 March 2017

WEEKLY ART PROJECT #22; IN MEMORIAM

Over the past few weeks, two of my friends have lost significant women in their lives.  Naturally that has led me to think about my own losses, and in particular, my very dear friend, Tanya.  She was a warm, creative & vivacious woman who affirmed my own creativity & was a wonderful role model.  When she died I planted a Correa Alba in her memory.

It is currently flowering, so it seemed appropriate that I have it as this week's muse for my weekly art project.
As per my usual practice, I did some sketching first.  The process of sketching requires that I REALLY look at what is in front of me.  It connects my hand with my eyes as together we get to grips with the shapes & positioning of each aspect of what the plant looks like.

As it happens...I also bought this book this week.  To be honest, I thought I'd give it to my daughter to put away & then give to me on Mother's day...but... I just couldn't resist looking beyond that beautiful foxy cover!!!!

Therefore, with fabric collage in mind, I rummaged through my green scraps for fabrics that matched the Correa Alba, always keeping in mind that the colours seemed to vary in different lights.

Once the chosen fabrics were ironed, I set about the process of moving them in, out & around a 15cm space in search of the perfect combination.  You would not believe how LONG this process took!  Perhaps I shouldn't have been so fussy, especially given this was to create a background, not the main focal point!!
 Without any particular formula, I wanted it to feel balanced & look 'right' to my eye.  This was the final combination, which I then fixed to the backing with running stitch.  It would have been quicker to have machine sewn, but I particularly like the process and look of hand stitching, so hand-stitching it was !!

The focal point was to be the flower, which I was representing in a stylized form.  Once the winning fabrics were in place, it was time to stitch the design through the flower fabrics AND the background.

There were a few layers to cut back.  As each layer is cut, it is a little like unwrapping a gift...I'm never quite sure what I'm going to find.  Although I do know what fabric is in that layer, the mystery is how it will look in cohesion with the other fabrics & within the context of the design.  Whilst I was very pleased with the flower itself, I was annoyed that I had oriented it so centrally.  I had intended it to be upper right more.  How was I going to redress the balance?

I started by softening the dramatic impact of the white flower.  On the bush, these flowers are tiny dots.  Coincidentally, my friend Tanya loved Aboriginal dot painting.  With these in mind, I explored the possibility of adding white dots.  As a trial I emptied the bottom of the hole punch.  Thank goodness it has been a while since it was emptied....there were lots of little paper dots I could move around my design to try & map out possibilities.  Once settled on a plan, I used the end of a pencil, dipped it in white fabric paint & dotted away!

The piece still needed something more.  So making a rough cut out of a branch of the correa leaves, I traced around it with black pen.  This proved to add interest.


This is the final, untrimmed piece.  I haven't cropped it because I really like the bits that stick out beyond the square frame.  In hindsight, perhaps I should've used a more appropriately coloured backing instead of my usual calico!  If this was a real piece of work as opposed to an exercise, I would actually unpick that flower & do the whole thing again, relocating it further upper right.  Regardless of that glitch, I am very pleased with the additional extras I've added.

It is such a pretty little flower & imbued with meaning because of who it was planted in memory of.  This little exercise is also special, because I have included a tiny section of one of Tanya's shirts she gave me, into the background.