I think I picked the last perfect agapanthus flower left in the garden for this week's art project study. It is so delicate & the beauty of the individual flower gets lost when we look at the agapantha head as a whole. I love the placement of the stamens, the way they sit low in the centre of the flower.
The rest of my aggies look like this...
I decided therefore to incorporate both in this week's project. Being short on time, I didn't spend too long thinking about how I could represent these two images together on textiles, I went with the first idea that popped into my head & proceeded with minimal planning.
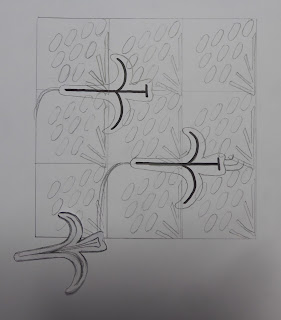
Thinking of the background first, I wanted to produce a stylised version of the head of green pods, so played with a few ideas with pencil, before blocking in my chosen design with pen.
The next step was to cut out a stencil from a scrap of freezer paper I had left over from another project. Having drawn up a grid on my background fabric it was time to get the stencil brush out & start! I happened to have some left over grey paint, so adding more white, I used it to create a repeat patterned background. I was very happy with the result & I was very relieved that that scrap of a stencil lasted 9 rounds of paint application! It was definitely ready for the bin after that though!
Whilst the background was drying, I whipped up a few quick sketches of the floret & settled on a profile design.
I cut out a copy of it to trace around on my 'map' (pattern) to see where it would work & where it wouldn't!!
After choosing some fabrics, it was time to sit at the sewing machine. Although there was very little actual stitching needed for this piece, I was using a cotton that was a contrasting colour to the fabric it was going into, therefore I needed to be careful to stay neat & straight!
Cutting back is where the fun starts & the first cut boded well!
Second & third cuts left me with a cute little floret that I was happy with. I didn't cut back the green at this point for two reasons; 1) It was needed for the stems of two florets 2) I still needed to stitch the stem outline in!
Carefully placing my 'sandwich' of fabric layers, I stitched in the next floret.
Then the process of cutting away began again.
The stems were drawn on with an air erasable pen before stitching in place & cutting back.
With the addition of some beads to pep it up, here is the final result. In hindsight, I would have preferred the grey stencil to be a little softer, so that it receded into the background more. I obviously didn't put enough white paint into the mix!!
Otherwise, I am quite pleased with this result, especially given my restricted time. I think I have now finished with the 'agapanthus meets contemporary reverse applique' experiment. Next week I'll find another source of inspiration from my garden.


No comments:
Post a Comment