Monday 28 November 2016

WEEKLY ART PROJECT#10; AGAPANTHUS BUDS


Another Monday has arrived & once again I am distracted with things OTHER than my weekly art challenge.  This week is week #10 of this discipline, and whilst I didn't want to miss out on producing something, my heart just wasn't in it.

 Still...I showed up & got on with it, & I'm glad I did.
There are many exciting changes happening in my garden, on a daily basis.  My muses this week are the Agapanthus  buds. We have a few clumps in various parts of the garden, this grouping alongside the red geraniums got my attention because they each had their own unique bud shapes & looked as if they were dancing whenever a breeze blew.

I began with a pen & some quick sketches which I enjoyed doing.  Then I made solid blocks of the bud shapes.  They make wonderful shadow shapes.

Having no sense of direction as to where I wanted to take the Agapanthus inspiration for my exercise, I quickly scrawled a map of the group of buds & the angles of their stems to add to my 'information gathering'.

Because I liked the quick placement map I had done, I decided to use that as a starting point for my background.  Out came the paint & brush!!

A foreground of strappy leaves also appealed.  Somehow I wanted to include the red of the geraniums, so I tucked some red into the fabric sandwich & hoped I'd have a better idea of what I wanted to do with it once I got to cutting back that layer!!  Quite unintentionally, I placed the frayed edge of the red along the base & I REALLY liked that, so....there was one decision made...I was going to keep that!!

Stitching in place and then...

...cutting it back. The leaf proportions are way off scale with the background shadowy shapes, but that's okay, I still liked them!

Instead of  cutting curves, I decided to cut the red straight across the horizon line. Don't ask me for an intellectual analysis as to why I chose to do that...it just seemed right to me!  I added a super sized Agapanthus bud & realised it wasn't enough, so...

...I added part of another one.  Using an air erasable pen, I experimented with additional lines, to see whether they might add something more to the piece.

With a bit of hand embroidery & a bit more machine stitching, this is the final result.

It intrigues me, as it isn't a typical 'style' for me & I find myself looking at it & saying "Wow! that's different!"
 I am really happy with it, especially given my mind had no idea in which direction the Agapanthus would lead me. As Christmas draws closer & with life happening, as it does, it is becoming more & more of a challenge to keep going with this project.  The benefit of making the effort has definitely been worthwhile so far...let's hope I can keep it up.


All photos in this blogpost are my personal property.  Please do not copy without permission.  Thank you.


Monday 21 November 2016

WEEKLY ART PROJECT #9; WET BARK SHADOWS

At 6.30 each morning, my husband & I greet the day & break our fast on the front porch looking out at our trees! We are serenaded by the resident magpies (aka the Patch family), we breathe in that fresh, just-waking-up air & contemplate how grateful we are to have both this moment & this place. 

This tree is particularly attractive & during a recent storm, I was enamoured by the stripes of colour revealed by the rain.

When the sun comes out, it is the shadow patterns that mesmerize me. With these attributes in mind, I chose to have this tree as my muse for this week's art challenge.

I began by tossing a bucket of water on the tree trunk & making note of the colours.

Seriously....isn't that colour incredible??? And I swear this has not been photo-shopped!

With my colour palette in pencil form, I then...

...made a few linear visual notes of bark colouring. This progressed to more abstract play with line & colour, working towards an idea I've been wanting to try out since seeing Monet's incredible waterlily studies in The Orangerie earlier this year. It was time to embrace my inner Impressionist!

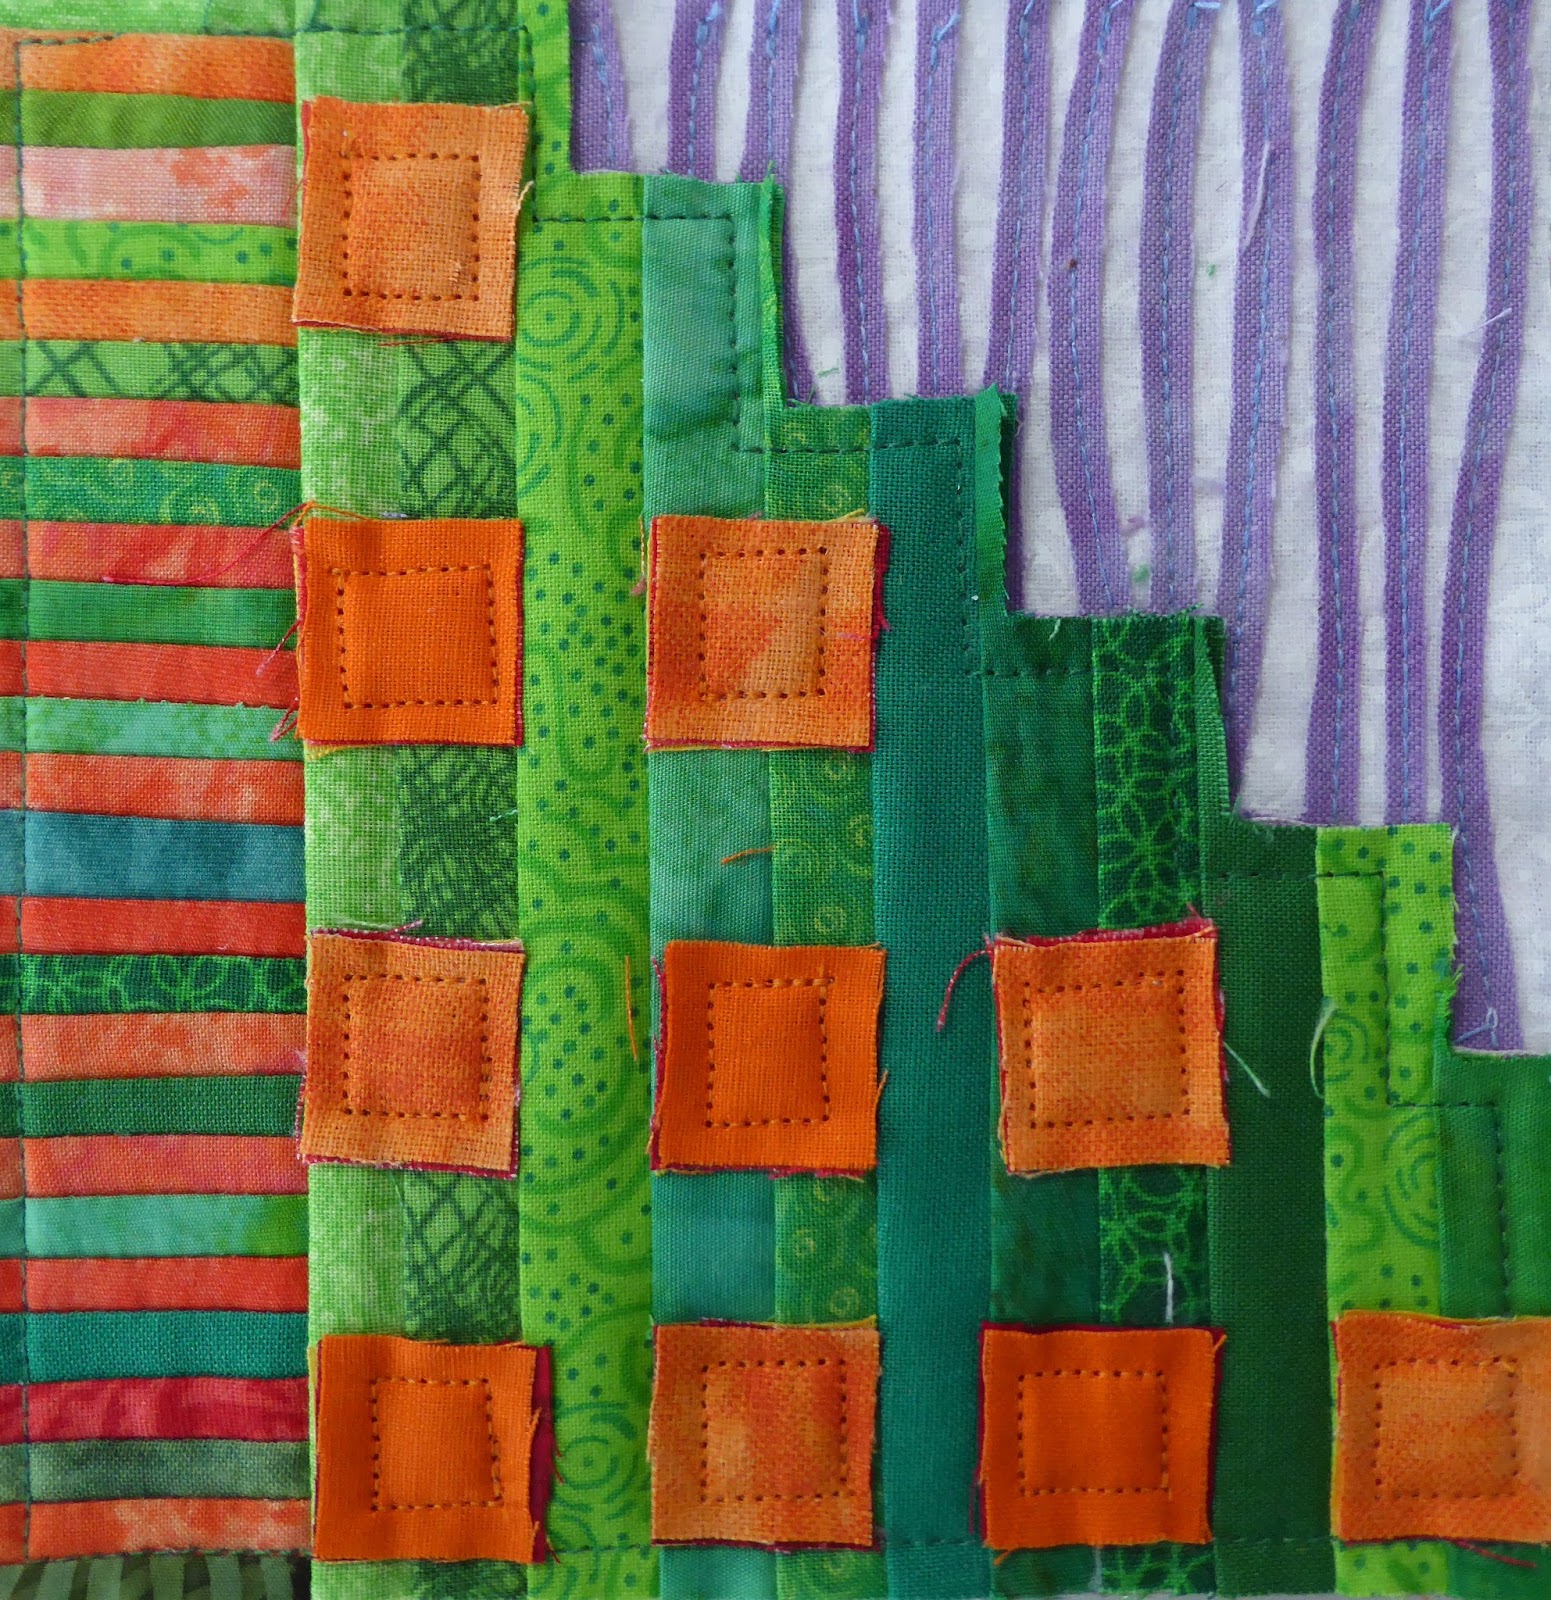
From coloured pencil to fabric choosing & a little bit of bravery as I set to work on an experiment! The plan was to layer multiple contemporary reverse applique sandwiches on top of each other, AFTER cutting back the one below.  Here's what I mean...


...I cut back the first 'sandwich' of fabrics.

I sewed down & then cut back the second 'sandwich'.

I sewed & cut back the third...

...and concluded with the fourth. I am very happy with how this looks. What you cant see in a photo is it's textural quality.  It FELT fantastic, I wanted to keep rubbing my fingers over it's bumps & shapes.  It truly was a little piece of relief sculpture. Not hard to believe when it includes 10 layers of fabric!

I guess a normal person would have left it at that!

But this piece needed to be taken one step further...I just wanted to try one more thing out.

I cut a stencil.

Take a deep breath & brace yourselves...what I'm about to do may make you gasp in horror!

Out came the screenprinting kit & down went the squeegee!

This is the final result.

No, it's not a nice clean print. In hindsight, maybe stenciling each piece by hand would have provided a cleaner line.  Maybe I had too much ink, or maybe it was the uneven surface that led to the edges bleeding a bit.(I did do a practice run which worked perfectly...but that was on a single smooth piece of calico!!) Regardless....I actually don't mind the imperfection.  To me the 'bled' bits are reminiscent of the stunted rivulets that formed lines on the tree branches in the first photo above.

What I feel I have achieved is a good representation of the dramatic colour variation of the dry tree bark with the wet tree bark. And the texture is still there. So....not pretty, but definitely worth the risk!


*Please respect that these are my photos of my own work, so please don't copy without asking me first. Thanks.


Monday 14 November 2016

WEEKLY ART PROJECT #8; NASTURTIUMS


I tend to let the nasturtiums go wild & free in our garden!  They love to climb up the brush fence, drape over concrete steps and...

...meander through our lavender bushes! They make me happy & so inspired this week's art project!

Also inspired by the recent exhibition by 'Four x Four', I decided to use collage to explore ideas for a design concept.  So I ripped out anything green or orange from a couple of magazines, found the glue stick & started playing!

I created 6 little collage explorations.

This is the one I chose to translate into fabric & stitch.

A rummage through the fabric stash provided me with options.

First things first...preparing the background.  In this case I wanted to reference both the brush fence & the lavender, so I chose to combine the two!

I used strip piecing to create the mid-ground & was very diligent about ironing every new addition once stitched. I regretted not having a fitbit to count how many steps I clocked up going back & forth!!

Completed & stitched to the background, my concern over an abundance of limey greens is eased by how good they look with the purple!!

Time to contemporary-reversify this piece.  First the background & then stitching on the nasturtiums, before...

...cutting back, and then...

...cutting back again.

  This is the finished piece.  There's no embroidery or beading on this one for two reasons; 1) There is more than enough going on in this 15cm square, & 2) I ran out of time!!


CUTTING BACK??????

Is this an environmental statement????

Nope...it's not! 

 I chose this title for my blog, because it is essentially what the textile art technique;  contemporary reverse applique, involves.  Lot's & lots of cutting back. 

 I'll show you what I mean soon, but first... what is 'contemporary reverse applique' & is it the same as 'reverse applique'?


Traditional reverse applique is the technique used by the Cuna people of South America to make their stunningly distinctive Molas.   I don't own a Mola myself, so cant insert an photo of the real thing to show you (google if you're interested), but the image above is my one & only attempt at trying the traditional technique.

In this case, three layers of fabric are layered on top of each other. A guideline is drawn onto the uppermost layer & then gradually parts of that top layer are cut away, needle-turned  & stitched neatly down.  The next layer is then cut & stitched in place the same way.  As you can see...I ...(embarrassed cough here)...never completed this sample, because it is sooooooooo hard doing all that needle-turning! Argh!!

CONTEMPORARY reverse applique differs in that a sewing machine is used to stitch a design through the whole 'sandwich' of fabric layers, & as each is cut away to the desired point, the edges are left raw & frayed.

Here's how I do it;

I create an outline for a design.

I make a few decisions about what colours/textures I want in each part of the design & then I choose fabrics that suit.

I work out which layer in the 'sandwich' each coloured fabric is going to be placed & note that decision on my design, so that I have a reminder!!

I trace the design onto my uppermost fabric.

I stitch that design through the layers using a sewing machine.

I cut back...

...to reveal the first layer.

I cut back to reveal the second layer.

I cut back to reveal the third layer.

Finally, I cut back to reveal the base layer. (Aren't you glad I only have a few layers in this demonstration!!)

I add a little hand stitching...to make it more interesting.

I add a few beads to give it a bit of oomph.

And finally, I do a little more tweeking until I'm happy with the outcome.

This is the basic process I use for ALL my contemporary reverse applique artworks.  It is very time consuming, has a high degree of risk (scissors are sharp & pointy & sometimes take off more than they should!!), but I love it...especially the cutting back.  To me it is like being a child unwrapping a gift at Christmas...magic!

This blog will share with you, not only my adventures creating art using this technique, but also my adventures exploring art in general.  Choosing to be an artist, means choosing to constantly learn, observe, adapt & explore further.

I hope you enjoy sharing the experience with me.