It all started when my husband sat down at the kitchen table, pulled down the Moroccan cookbook from the shelf, flicked through & said, "Ooooo, can we please put Chicken & Olive tagine on the menu plan for this week?" (Oh yes we could!)
The very next day a friend sent me a message saying she was off to Morocco & asked what pens I recommended for sketching & journalling whilst away!
That night, whilst making a salad, I opened up a beautiful red pomegranate to find the most pitiful, dry kernels & consequently grumbled away that "I wish I was in Morocco where they have decent pomegranates...mutter....mutter....mutter."
On Saturday morning, I sat on the front porch, coffee in hand, & asked my husband, "What flower should I work from for my weekly art project this week?" He replied, "How about that small purple one at the front gate, it's in flower at the moment". "Oh, you mean that Moroccan Ground cover one?" "Yep, that's the one!"
Sometimes life just seems to flow to a theme!
This beautiful little ground cover really does have 'Moroccan' in it's name. Unfortunately, I'm not greenfingered enough to remember plant names properly, so it is usually 'That-Little-Moroccan-Thingy'. Regardless of it's proper name, it is charming.
But, what was I going to DO with it this week?????
Because Morocco has been so much on my mind, I have spent some time going back over the photos of our trip there a few years ago. (Never once did I see this plant there by the way!!!)
I am particularly enamoured with & inspired by the fabulous decorative work of Moorish buildings.
They truly make my heart sing, & a lot of my main art work references this style.
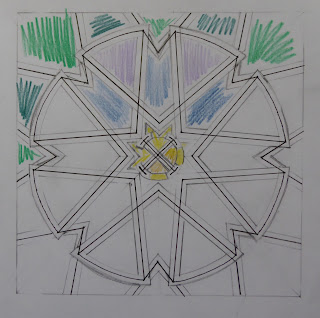
Looking at them again, I wondered whether I could recreate this little flower into a design reminiscent of the fabulous tile work I saw over there.
No harm in trying, right???
Out came the pens & paper & over an embarrassing amount of time, I managed to work out a few ideas that just might work!
Out came the rulers & templates & I set about transforming my rough squiggles into a well planned geometrical design.
Usually I work out my colour scheme and THEN rummage through my stash. This time, however, I particularly wanted satin fabrics to give the shine of tiles, so I had to see what my resources were before choosing my colour palette.
I played around on paper with a few combinations & also decided what my stitching lines would be. I made the brave decision to have 2 different outlines. The lower (slightly darker colour) would be sewn on first, and then the top one would be sewn on. This is tricky because they have to match up. I try & help myself with this by having both pieces exactly the same size & place them accurately first on the light box to trace the design, & then on the fabric sandwich to stitch. Even so.....things don't always go to plan!
Take a look at how the cutting back went...
It may be hard to believe, but I cut back 8 layers in this piece! There was just one final thing to do.
The difference between these last 2 images, is that this one has been ironed! It seems to set the piece & give it a more finished look. I know that with all the man-handling of cutting back, the outlines have become a bit frayed, but I can trim them later.
I am very pleased with the end result, as I don't feel my little flower has been lost in the process of geometrification! This does also resemble Moorish tile work...albeit in a somewhat simple form.
This week's project highlights that inspiration can come from all manner of things & experiences!!


No comments:
Post a Comment